At a certain point in the a teams usage, many teams want the emails sent from their ServiceM8 account to come from their business domain email rather than from ServiceM8's generic email. There are a number of reasons for this, but lets focus on how to set this up.
The Basics
If you have not yet enabled the Custom SMTP Add-on, here is a link to do so:
https://go.servicem8.com/help_me/ActivateCustomSmtpAddon
Additionally here is the link to the ServiceM8 Support Document on this add-on (keep in mind there are some aspects which are out of date (ie Google):
https://support.servicem8.com/hc/en-us/articles/202296764-How-to-setup-a-Custom-SMTP-Server
There are 4 data points needed to setup your SMTP:
- Host Name
- This is smtp address for your email platform (ie: imap.gmail.com)
- User Name
- This is the email address ALL emails from ServiceM8 to your clients will go out of
- Yes, this means that emails will come from a single account and the from the individual who sent it, and yes this objectively better (exhibit A, exhibit B) within a business consisting of more than 1 person.
- Password
- This is the password for the email being used (except for when using Google's Gmail or Workspace/GSuite/etc, see below)
- Connection Method
- This is the security method being used per the email platform
Sample SMTP Setup Settings
Google's Gmail or Workspace/GSuite/etc
In the past you could use basic email and password, however recent privacy changes by Google requires the following:
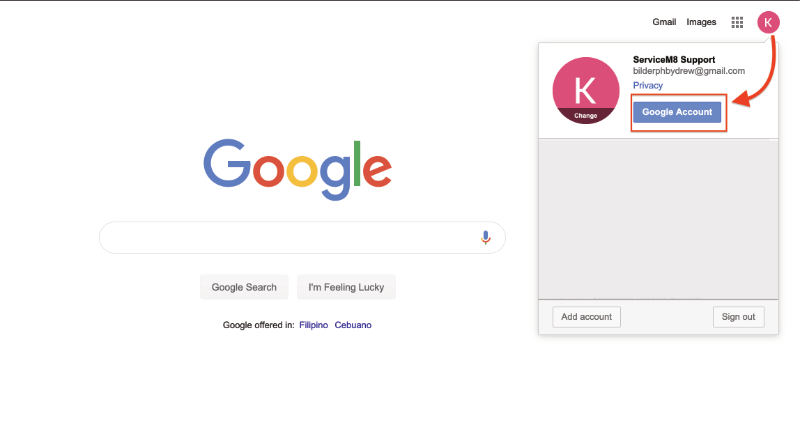
1) Log-in to your Google Account that you wish to use for SMTP Server Configuration and access your Google Account page.
2) On your Google Account page, click on Security. Then click on 2-Step Verification option which is still off.
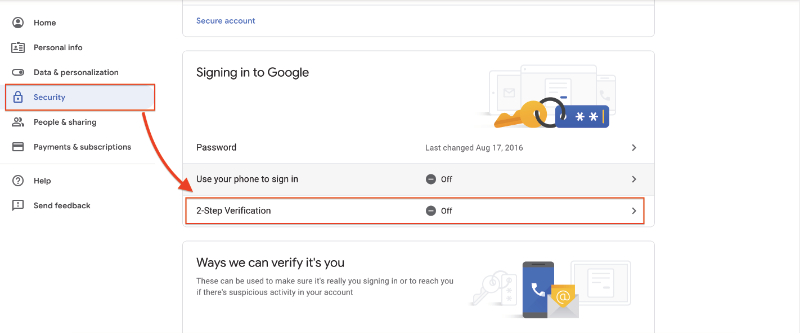
- This does mean you will need have 2-Step Verification enabled on this account if you are not already using this.
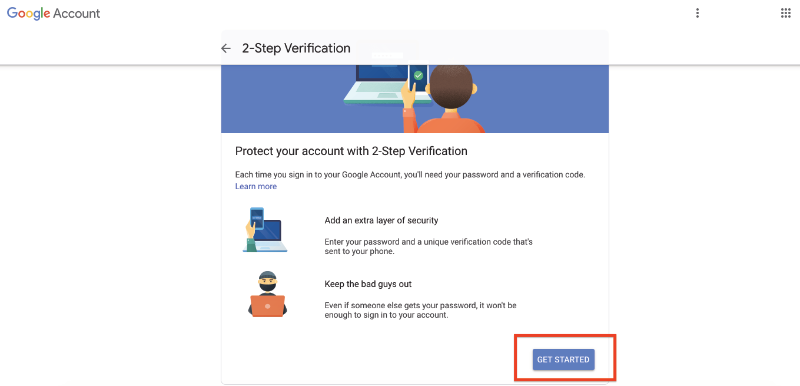
3) Click on Get Started and follow the set-up wizard to complete the activation process.
4) Once done, go back to the Google Account page and now the 2-Step Verification option should indicate that it’s ON.
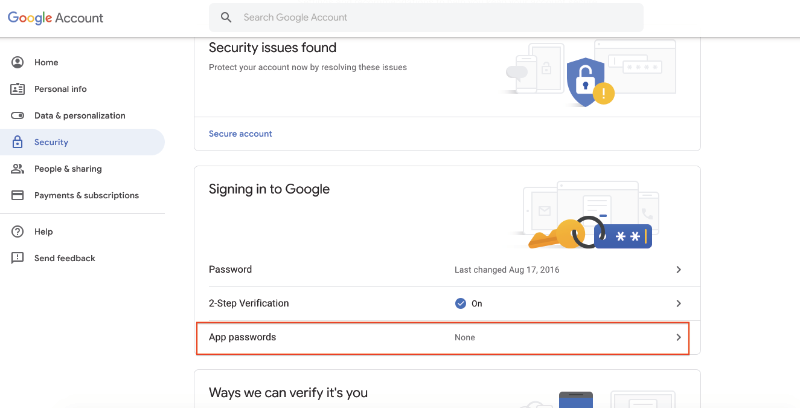
5) Next is to click on App passwords option to generate the password that you will use when you configure the SMTP Server in ServiceM8.
6) On this page, click on Select App and click on Other (Custom Name). You can use “ServiceM8” as your custom name since you’ll be using it for your SMTP login in ServiceM8 and click GENERATE below.
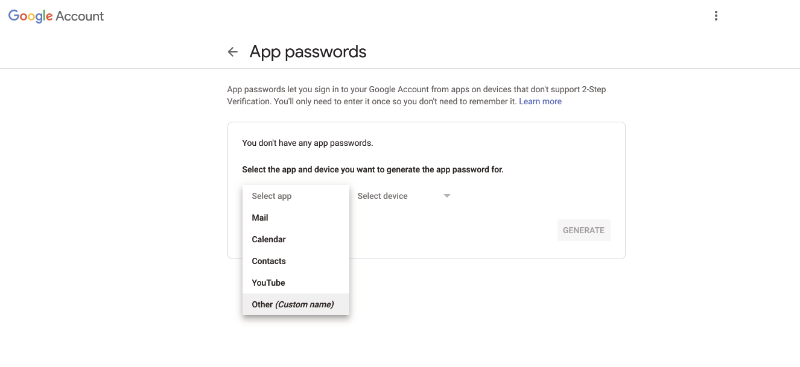
7) This time, you’ll need to copy the 16-character password shown on the page. Instead of your usual password for the email address login, you will be required to use this password to complete the set-up of your SMTP.
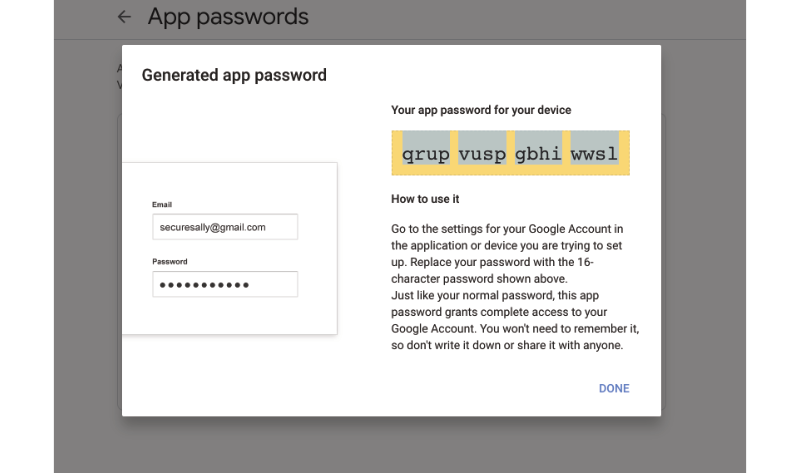
Keep in mind that if you try to copy directly from the screen that there are spaces added between each four character grouping of the password, and they will need to be removed for the password to work.
8) Lastly, go back to your ServiceM8 account and make sure that you have activated the Custom SMTP Server Add-on.
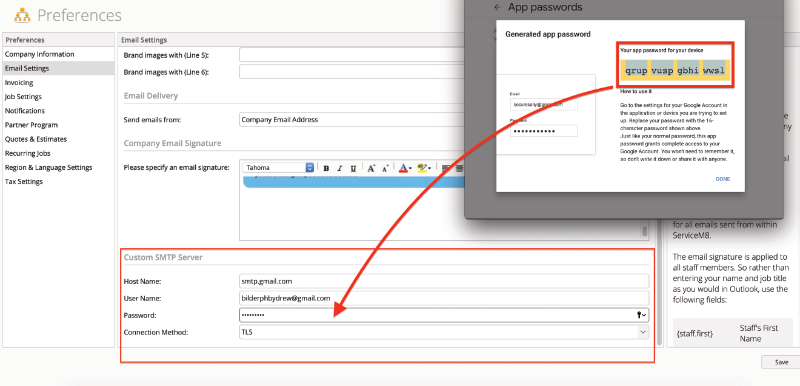
This should look like the following:
- Host Name: imap.gmail.com
- User Name: [email protected] (your desired company email)
- Password: your16digitcode (no spaces)
- Connection Method: TLS
Office 365
ServiceM8 has a dedicated add-on for this provider, which is available here:
https://go.servicem8.com/help_me/ActivateOffice365Addon
GoDaddy
- Host Name: smtpout.secureserver.net
- User Name: [email protected] (your desired company email)
- Password: youremailpassword
- Connection Method: TLS
NameCheap
- Host Name: mail.privateemail.com
- User Name: [email protected] (your desired company email)
- Password: youremailpassword
- Connection Method: TLS
1and1
- Host Name: smtp.ionos.com
- User Name: [email protected] (your desired company email)
- Password: youremailpassword
- Connection Method: TLS
Others
There are MANY other email providers out there, and this is only a short list of the common platforms we at Digital Data Designed either use or many of our clients use. Your company may be using a different provider, and will require some research to identify the correct settings to be applied in your account.